I ended up with a 15 inch steering wheel and that seems to be a good blend.
In for a penny
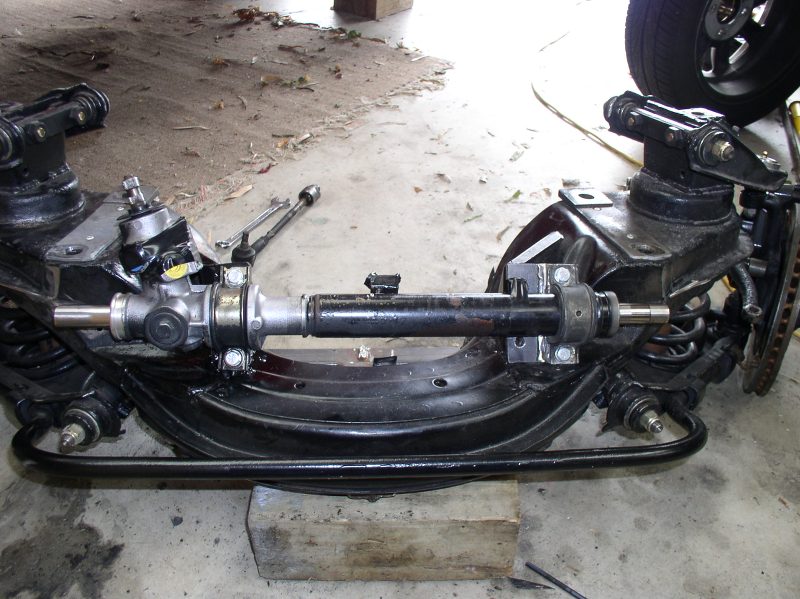
Mal wrote:MX5 Fitted. Centre of the rack shaft is the same distance from the mounts as the Tiger rack.
Looks like you've got it on the way now.. better send me an e-mail update...
Just like mine with a mirror image...did you massage ( taper ) the back of the pinion side to help the angle for the steering u-joints??
Jim ( in Canada )
[url[/img][/url]
-
Tom_HRO260
- Posts: 91
- Joined: Fri May 14, 2010 5:25 am
- Location: Melbourne, Australia
Nice work on the image Jim - great point of comparison and a good working reference point for pinion angle. Mal: I see the pinion position is also a lot kinder than the RX7 though I agree, some radiator re-routing looks inevitable.BlackDog wrote:Just like mine with a mirror image...did you massage ( taper ) the back of the pinion side to help the angle for the steering u-joints??Mal wrote:MX5 Fitted. Centre of the rack shaft is the same distance from the mounts as the Tiger rack.
Just a quick one - what's the boss mid point on (both) racks? Is it a union for plumbing? Looks awfully close to balancer/pulley. Will you also need to steepen the angle of the fluid lines from pump? Jim's image shows a line that looks like it would be close to drivers side rail.
Top images and information chaps - thanks again.
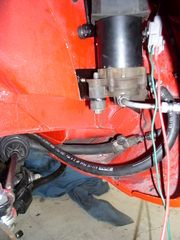
I hadn't modified the lines yet in that pic. Those are all factory lines. The one that looks vertical is the return line with a banjo fitting on the end. I cut the pipe short and welded a 90° an fitting to it. The line on the outboard side is the pressure side and yes, it's close to the rail but just fits nicely. I also had to replumb the lines going across the rack.. rad is an extra 3/8" thick just to make it even more difficult 
Like this..
 [/img]
Like this..
 [/img]
-
Tom_HRO260
- Posts: 91
- Joined: Fri May 14, 2010 5:25 am
- Location: Melbourne, Australia
Aha!BlackDog wrote:I hadn't modified the lines yet in that pic. Those are all factory lines. The one that looks vertical is the return line with a banjo fitting on the end. I cut the pipe short and welded a 90° an fitting to it. The line on the outboard side is the pressure side and yes, it's close to the rail but just fits nicely. I also had to replumb the lines going across the rack.. rad is an extra 3/8" thick just to make it even more difficult
So, I guess no winding the engine over by hand then! Very nice work on the lines and yep, not a hair's breadth to spare! BTW, if you've lost that 9/16th (at a guess) open-ender - it's under the engine...
JimJust like mine with a mirror image...did you massage ( taper ) the back of the pinion side to help the angle for the steering u-joints??
Jim ( in Canada )
Yes I did. Like you told me, if you don't the pinion angle is straight up. You can't angle it back any further because of the hyd boss.
Thanks again for the help. Interesting having both LHD & RHD posted up here. RHD has the water elbow to work around and alternator which I think is out of the way.
TomVery nice work on the lines and yep, not a hair's breadth to spare!
The fan belt only just goes on. You can see the belt in one of my pic's. It has the teeth which helps slide it past the boss.
I will make a water elbow out of exhaust tube. If the weld is good I will use it. Otherwise I will get it copied in stainless. Exhaust tube is not the nicest to weld and the U bends you buy are a lot thinner on the outside radius than the inner radius.

Electric pump fitted inside the drivers front guard.
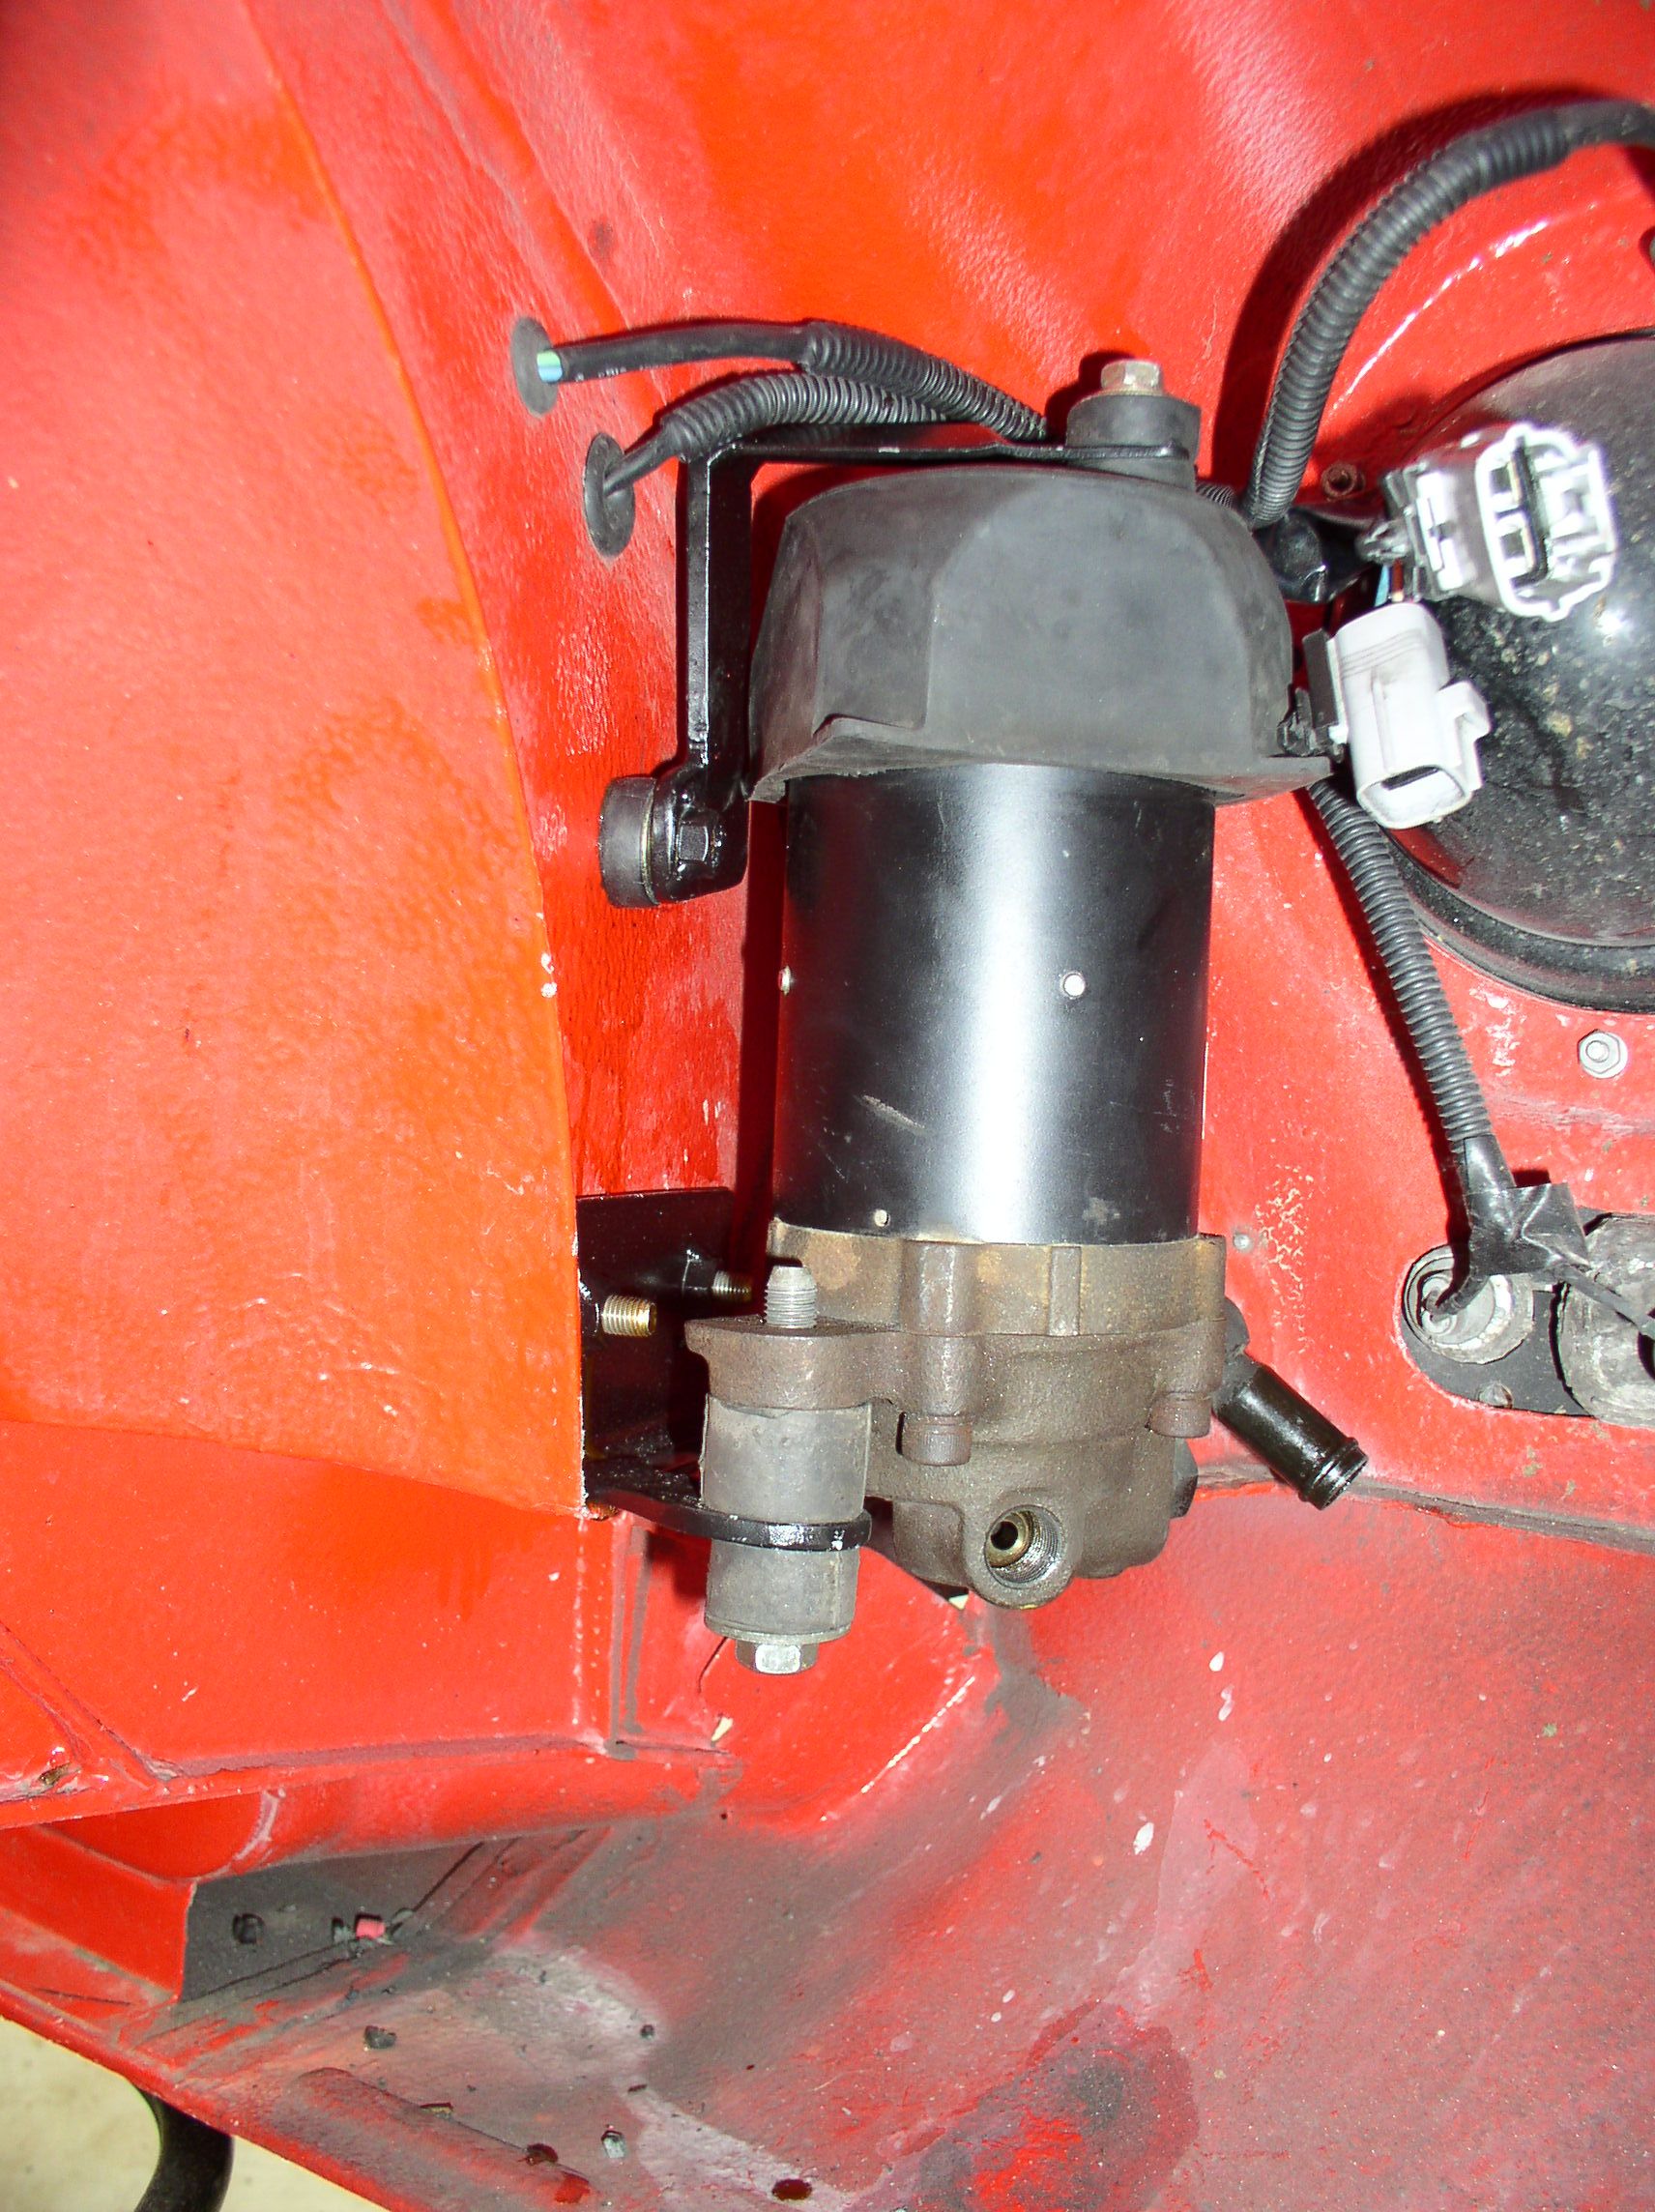
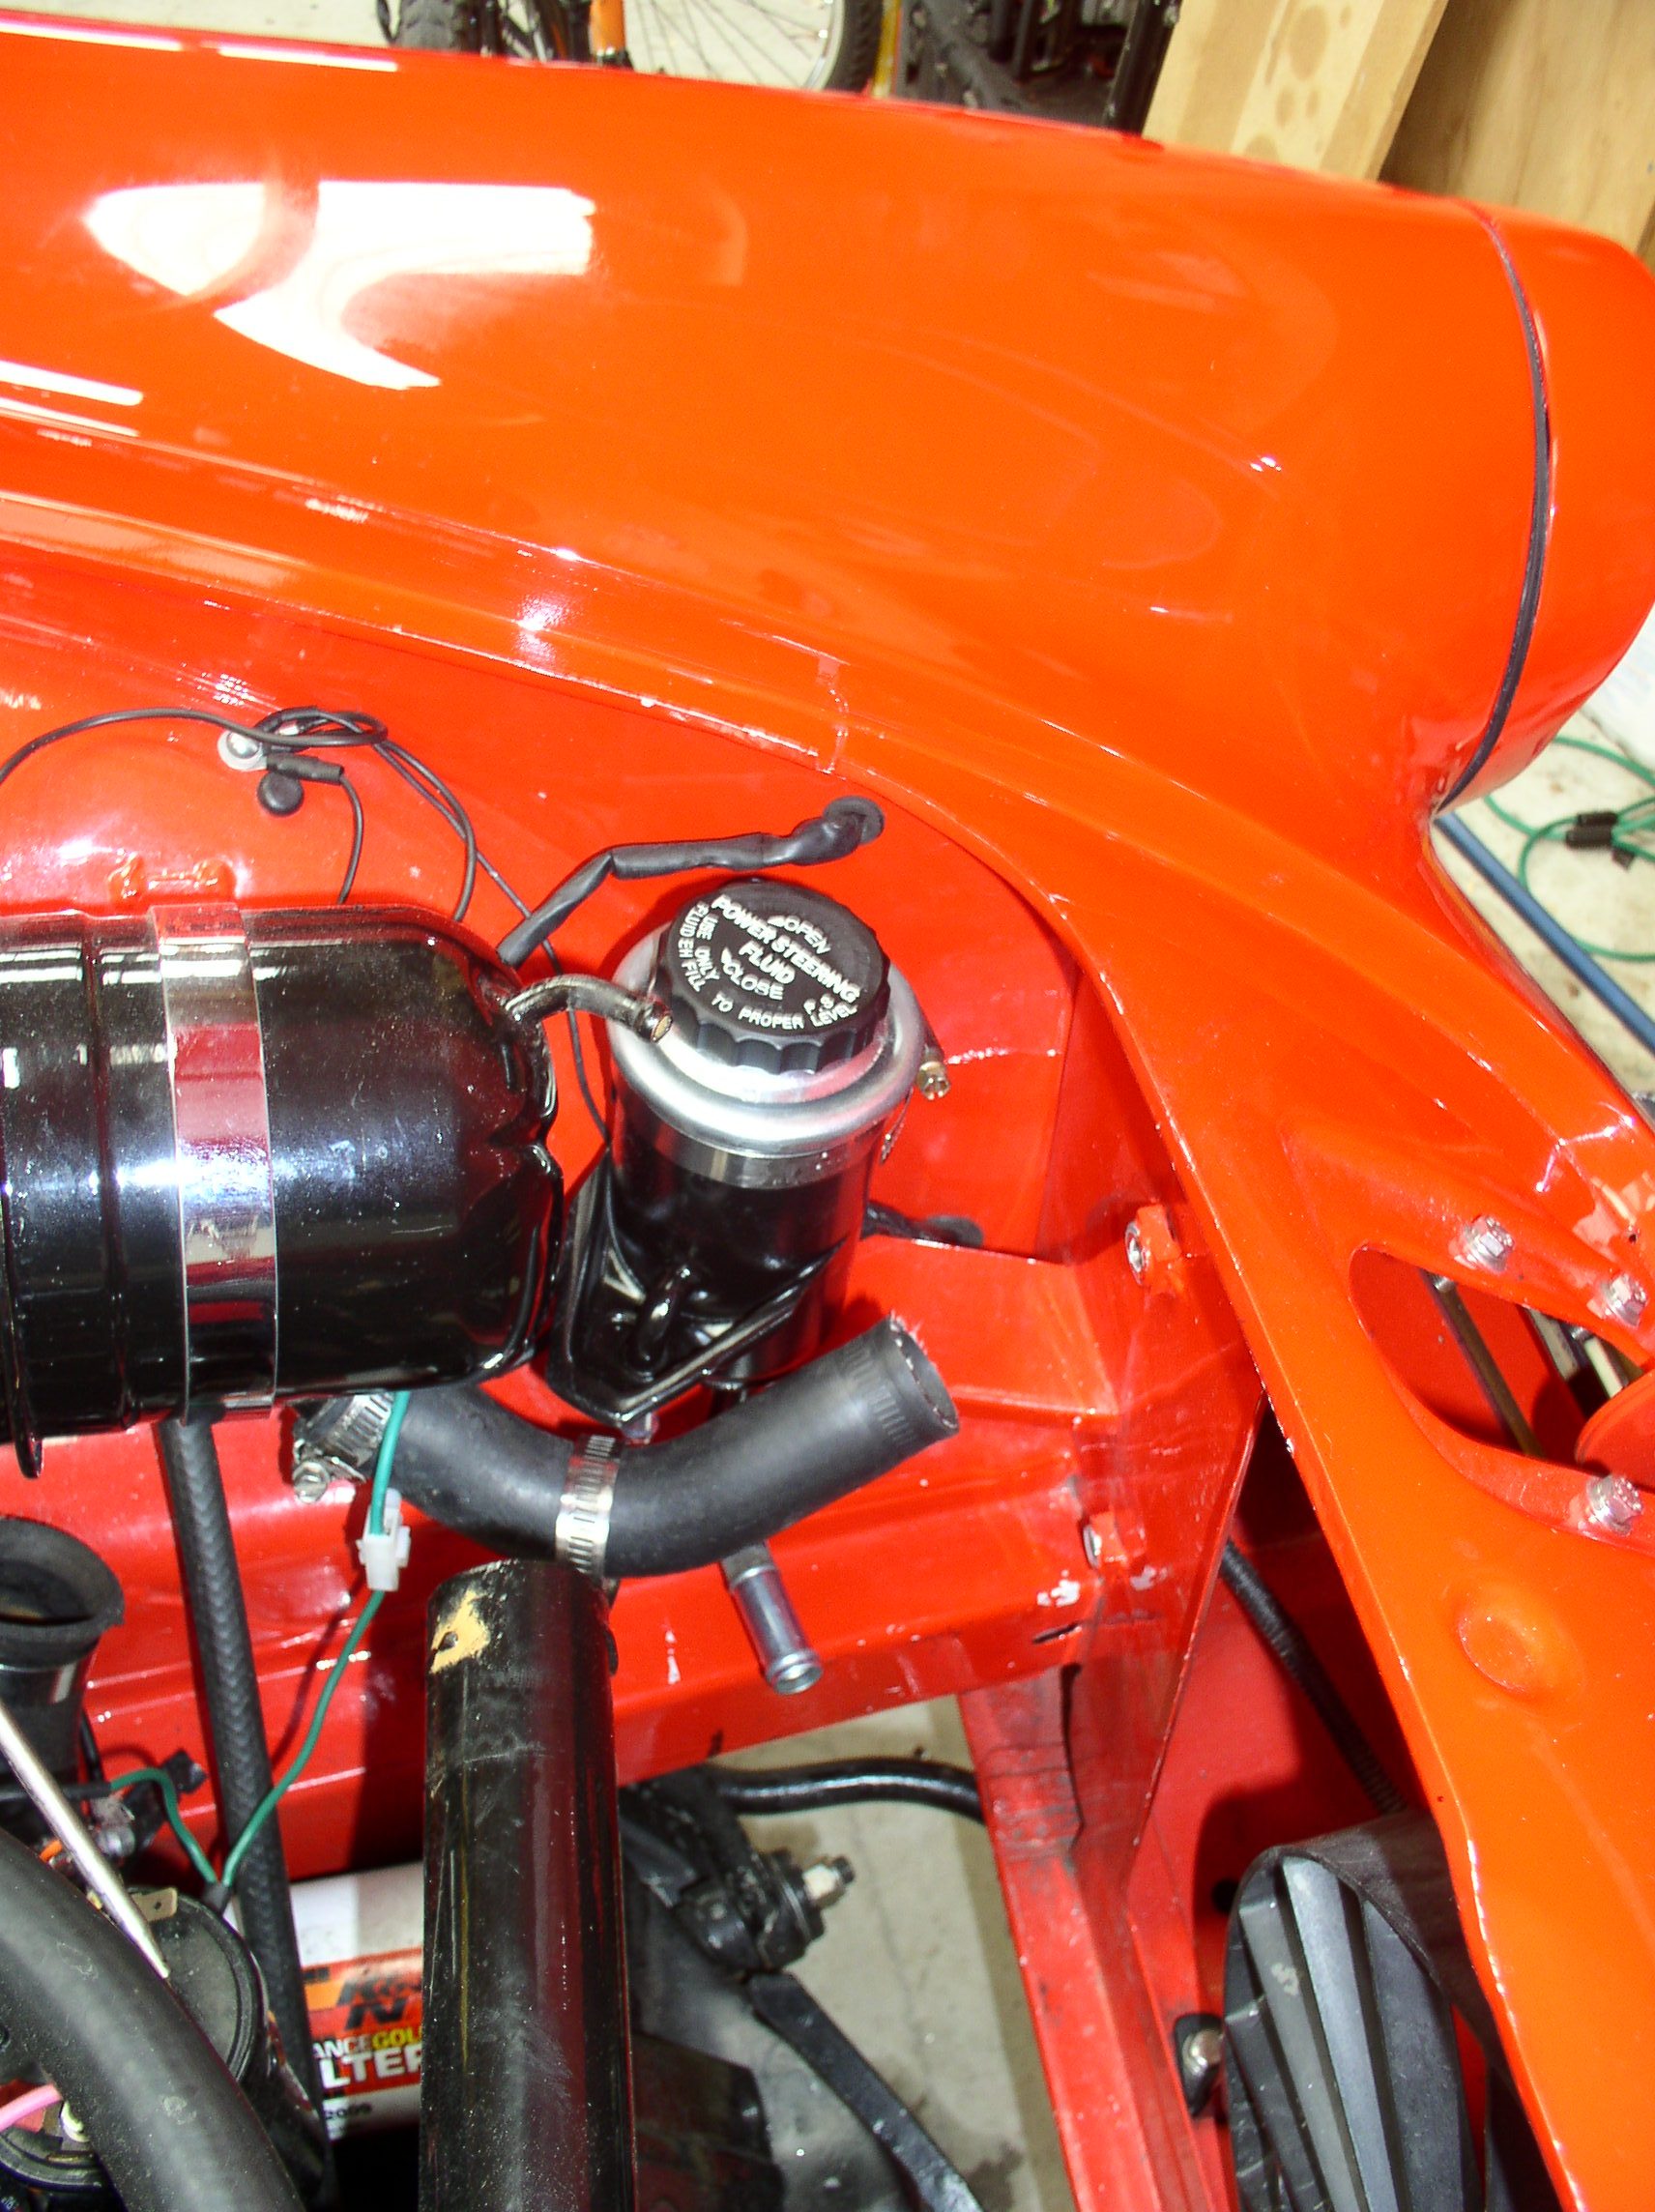
Power steering fluid reservoir. This is from the MR2 as well.
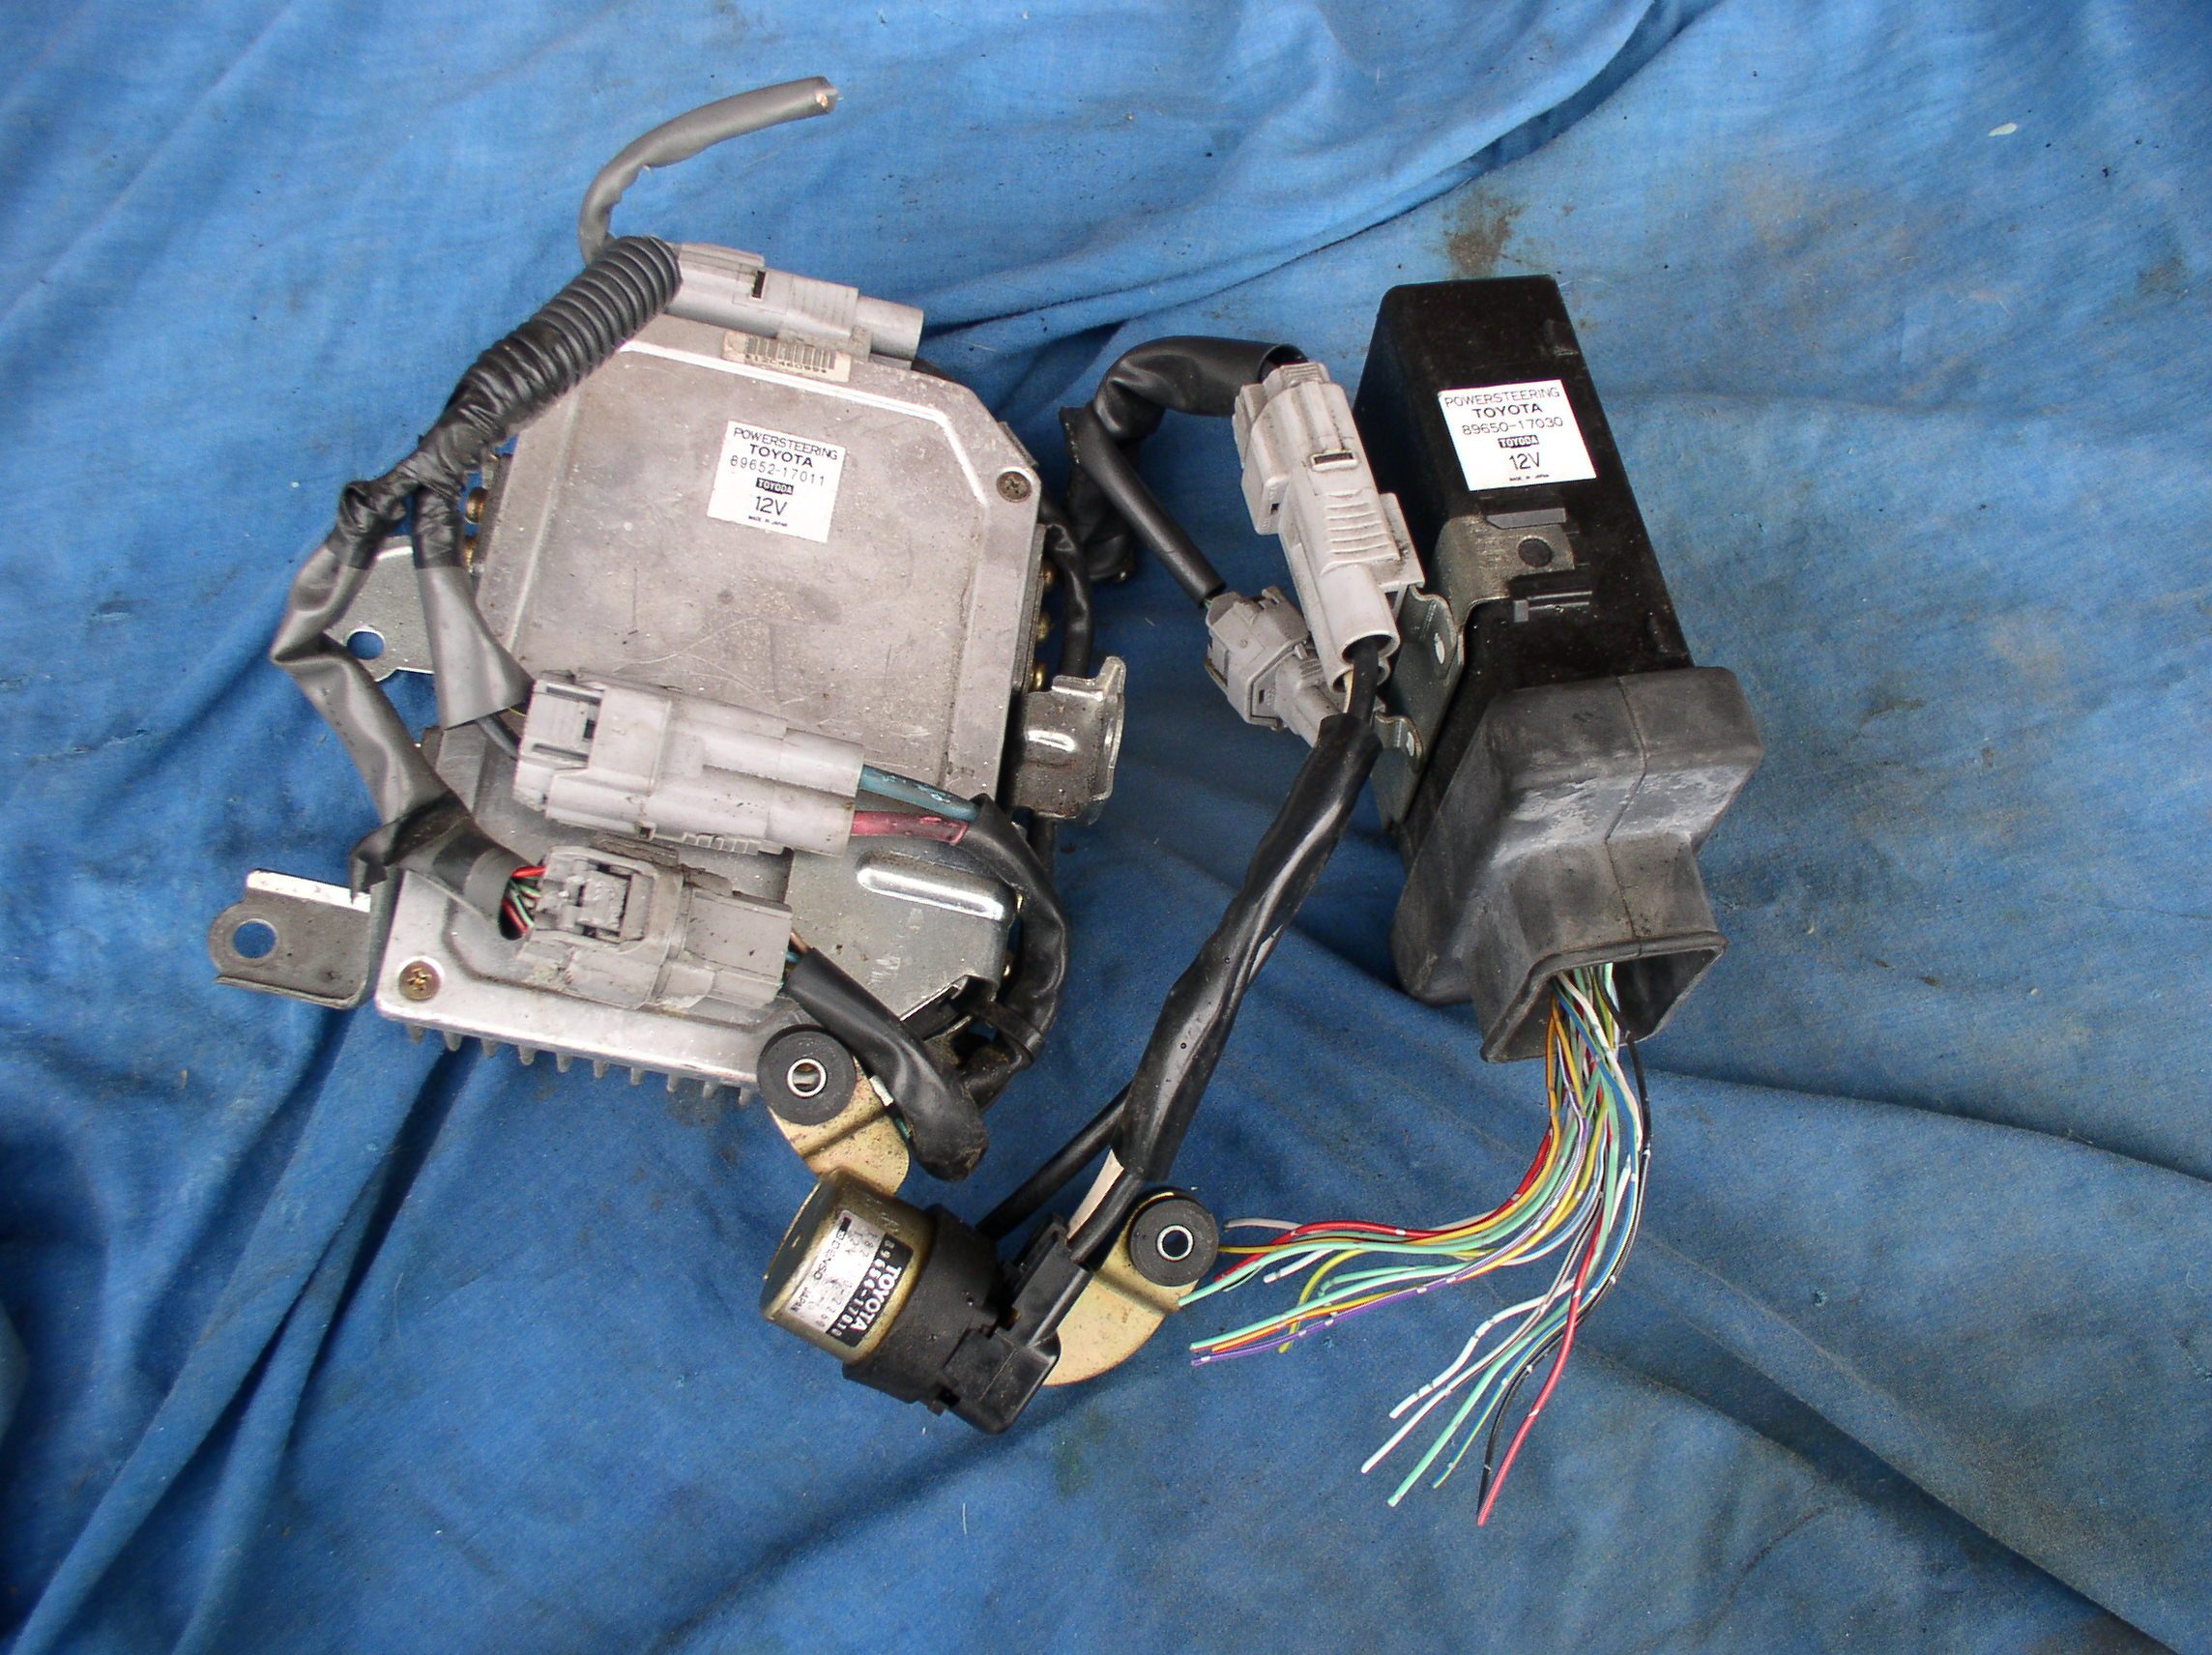
I was given these power steering speed control boxes with the pump. I don't
know if they can be made to work in the Tiger. Not a lot more than a red wire and a black wire involved, and I'm shot to bits.

Power steering fluid reservoir. This is from the MR2 as well.

I was given these power steering speed control boxes with the pump. I don't
know if they can be made to work in the Tiger. Not a lot more than a red wire and a black wire involved, and I'm shot to bits.


I finished off the install this morning apart from the wiring. I did have a temporary wiring set up just to test for any leaks or problems. As with anything in a Tiger it is Tiger tight.
I didn't think I could have used the original water elbow so I made up this.
I welded a bolt to the top of it so I could use the original holding tab to fasten it to the chassis.
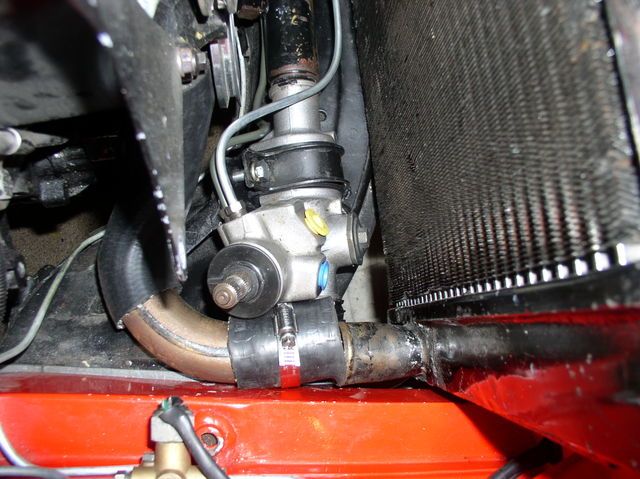
Here is a pic of the original elbow. Still going to be tight to get the hose on at the radiator end. In the end I used the elbow I made up as I thought it would be less restrictive.
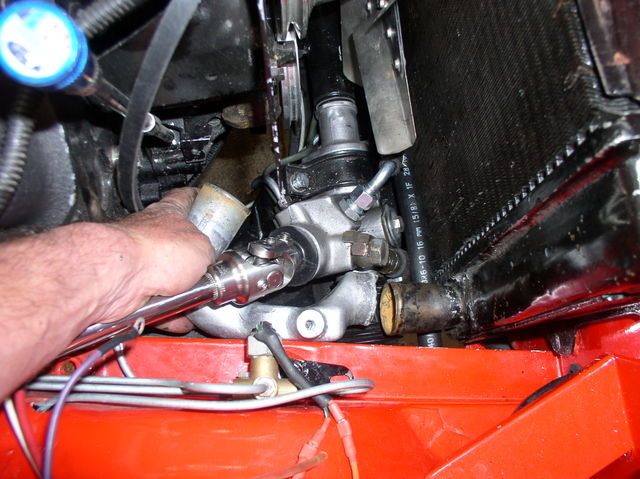
Finished off and it all fitted in

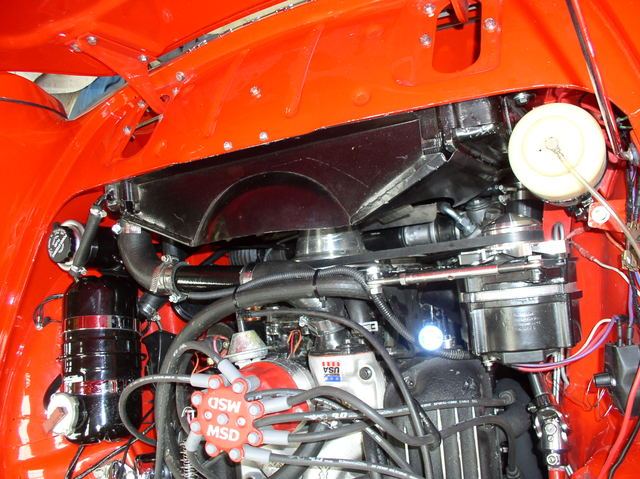
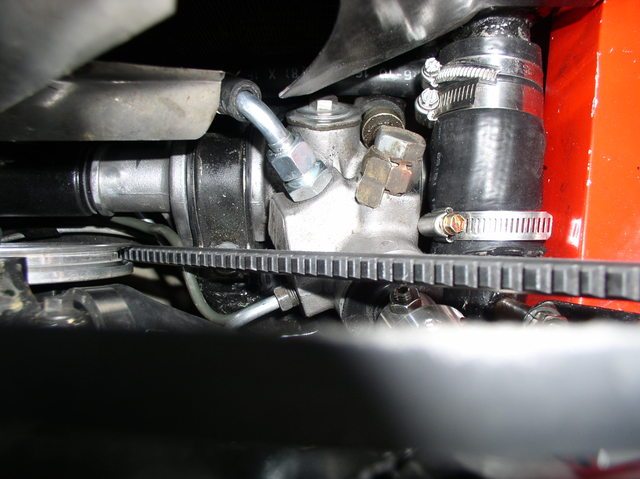
I have driven the car without the pump wired and it is a big improvement already. I can see the the advantage of having the speed sensitive steering working. The steering is light enough at open road speeds without the aid of the pump.
Cheers Mal
I didn't think I could have used the original water elbow so I made up this.
I welded a bolt to the top of it so I could use the original holding tab to fasten it to the chassis.

Here is a pic of the original elbow. Still going to be tight to get the hose on at the radiator end. In the end I used the elbow I made up as I thought it would be less restrictive.

Finished off and it all fitted in


I have driven the car without the pump wired and it is a big improvement already. I can see the the advantage of having the speed sensitive steering working. The steering is light enough at open road speeds without the aid of the pump.
Cheers Mal

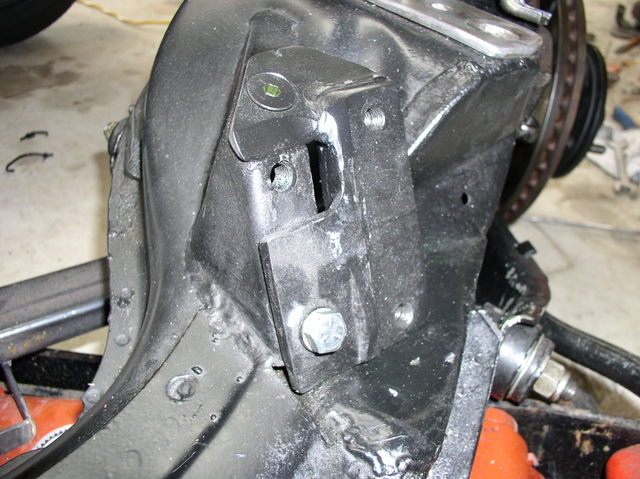
Here are a few more photo's of the install. I decided to modify the pinion mount instead of having a bracket mounted to the side of the original rack mount.
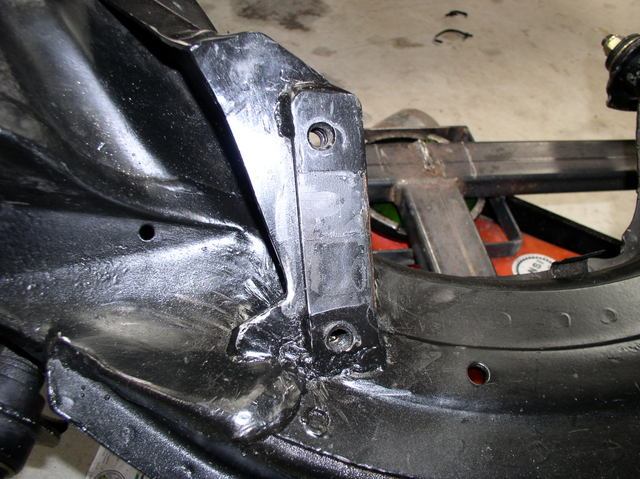
On the non pinion end I had to cut the corner off the mount to get enough clearance for the hyd fitting as I ended up with to much of an angle for the pinion to be connected with the universal joint.
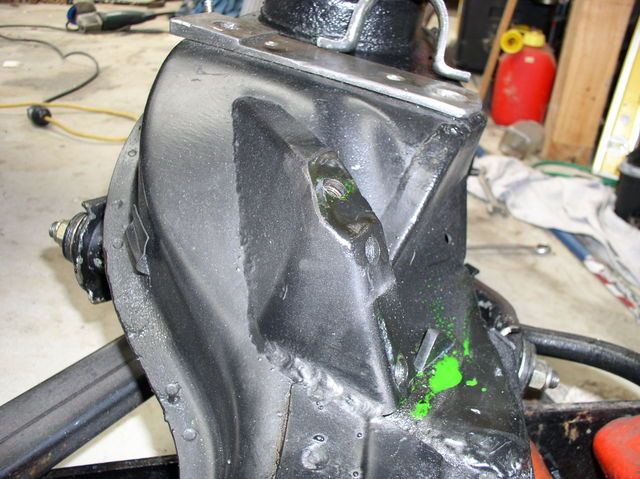
The car is a pleasure to drive now. Parking and tight traffic islands are a breeze. I think it is well worth the effort.
A big thanks to Jim for his help with the project. It makes it a lot easier when you have someone else who is willing to provide lots of photo's and give guidance.
Cheers Mal
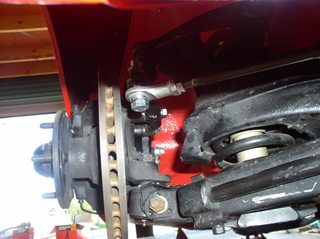
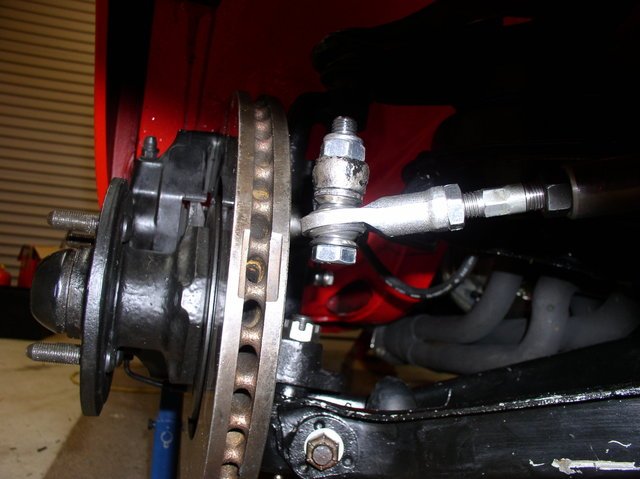
I now have the MGB steering arms mounted as they would be in an MG. I used spacers to space the hemi rod ends away from the steering arm and made a home made device to measure the bump steer. I just used a steel rule. I have to have it no greater than 8mm through the entire travel of the suspension.


On the non pinion end I had to cut the corner off the mount to get enough clearance for the hyd fitting as I ended up with to much of an angle for the pinion to be connected with the universal joint.


The car is a pleasure to drive now. Parking and tight traffic islands are a breeze. I think it is well worth the effort.
A big thanks to Jim for his help with the project. It makes it a lot easier when you have someone else who is willing to provide lots of photo's and give guidance.
Cheers Mal
I now have the MGB steering arms mounted as they would be in an MG. I used spacers to space the hemi rod ends away from the steering arm and made a home made device to measure the bump steer. I just used a steel rule. I have to have it no greater than 8mm through the entire travel of the suspension.


Mal, that certainly looks a perfectly engineered modern upgrade, very impressive.
Until you raised it I my simple mind hadn't appreciated the effect of 'bump steer' until I cam across this visual aid: http://youtu.be/gKJAukSZRT0
Shows how inferior the factory front suspension is on a Tiger, then again it was designed for a Hillman Husky Van .............
Until you raised it I my simple mind hadn't appreciated the effect of 'bump steer' until I cam across this visual aid: http://youtu.be/gKJAukSZRT0
Shows how inferior the factory front suspension is on a Tiger, then again it was designed for a Hillman Husky Van .............
Thanks Tony.
I had no choice but to find out about bump steer, but I am glad I did. Also using hemi rod ends allows more room for adjustment.
My bump steer device has one board the same dia as the wheel bolted to the hub with a centre line. The other vertical board is set 15mm away from the hub board. That's why the bottom measurements all read 15mm.
I then marked lines up every 10mm and jacked the lower A arm up until it hit the bump stop taking measurements every 10mm.
By using washers as spacers between the hemi rod end and the steering arm I got to down to 5mm over the entire suspension travel. You can see on all of the different recordings that there is no bump steer through the middle of suspension travel which is where most of normal driving would be.
I had the springs and sway bar removed when doing this.
Cheers Mal

Nice work Mal and definetly something i will look at once i'm further on.
I see you are using the low-torque type jubiliees, the ones with open holes, i find they tend to scuff up the hoses, if you thread heatshrink over them then they don't and the clamping action is the same.
I see you are using the low-torque type jubiliees, the ones with open holes, i find they tend to scuff up the hoses, if you thread heatshrink over them then they don't and the clamping action is the same.
1966 Sunbeam Tiger Mk1
Hard top time
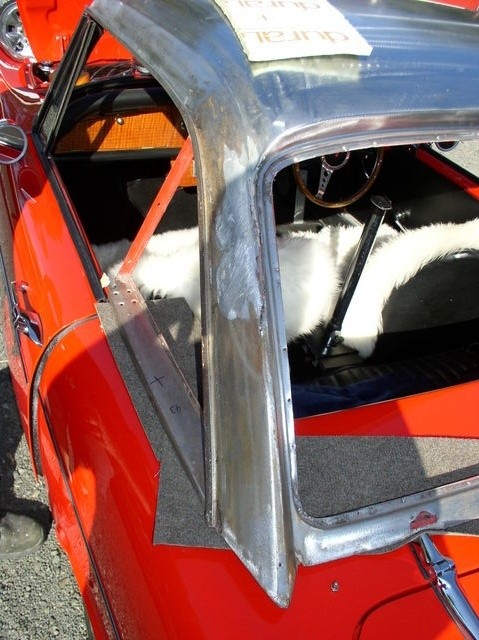
The first photo shows the new piece welded in down the side of the outer skin.
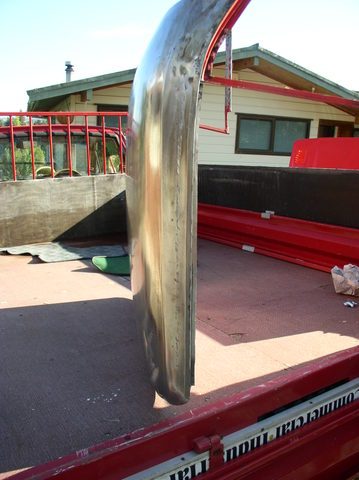
New inner pieces welded in.
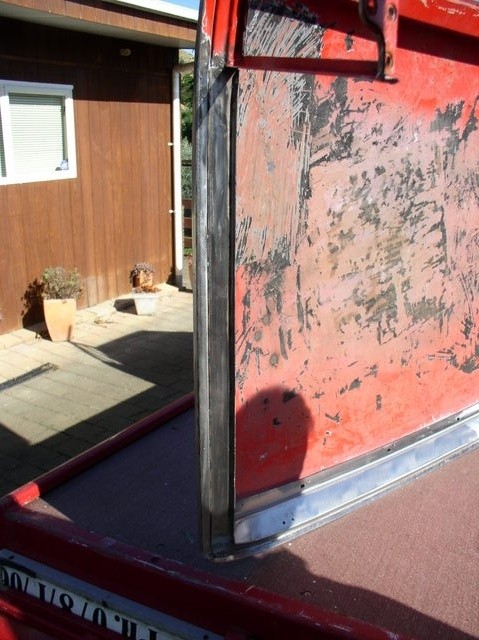
Needs a lot of work in the rear section of the top. The part below the side windows all needs to be rebuilt.
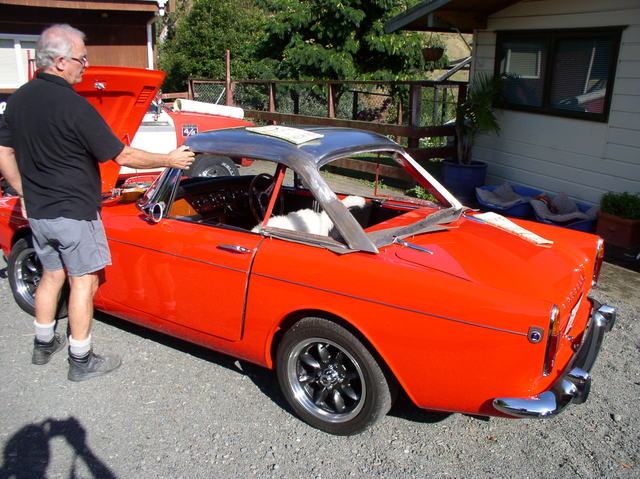
Seeing how it is fitting so far. Man with the golden hammer at work. We had to do some twisting and massaging to get it sitting correctly.
[
The first photo shows the new piece welded in down the side of the outer skin.

New inner pieces welded in.

Needs a lot of work in the rear section of the top. The part below the side windows all needs to be rebuilt.

Seeing how it is fitting so far. Man with the golden hammer at work. We had to do some twisting and massaging to get it sitting correctly.
[


